
Table of Contents
When it comes to operating systems, Windows 10 is the most favorite OS amongst the gamer community of this age. Microsoft has adapted this OS to allow optimization and achievement of next-level gaming performances.
However, unless you’re building yourself a gaming PC, no PC comes optimized for gaming right out of the box! PCs, after all, are multipurpose machines and to get every bit of performance out of them, you must know how to optimize windows 10 for pc gaming.
It supports retro and native games, best graphics drivers, and features a Game Mode for Windows 10 optimization gaming. But it’s not as breezy as it sounds! All these performance boosts and possibilities come only after you tweak Windows 10 for gaming the right way.
Here’s a quick guide for you to learn how to tweak Windows 10 for gaming, which settings and updates to make, and what to avoid.
Disable Mouse Acceleration
The first thing to enhance your gaming performance when using Windows 10 is to disable your mouse acceleration. This is a setting that moves your mouse move not only at physical cues but also at speed.
When this setting is turned on, it can make your mouse movements less accurate by adding an additional parameter to movement conveyed to the mouse by the user. If you’re fond of Counter-Strike, Valorant, or Call of Duty types of games, you need to turn this setting off for critical precision and accurate aiming in first-person shooters.
To disable mouse acceleration, follow the following steps:
- Hit the Windows key + I.
- Type “mouse pointer” in its search box.
- Then choose “mouse pointer display or speed”.
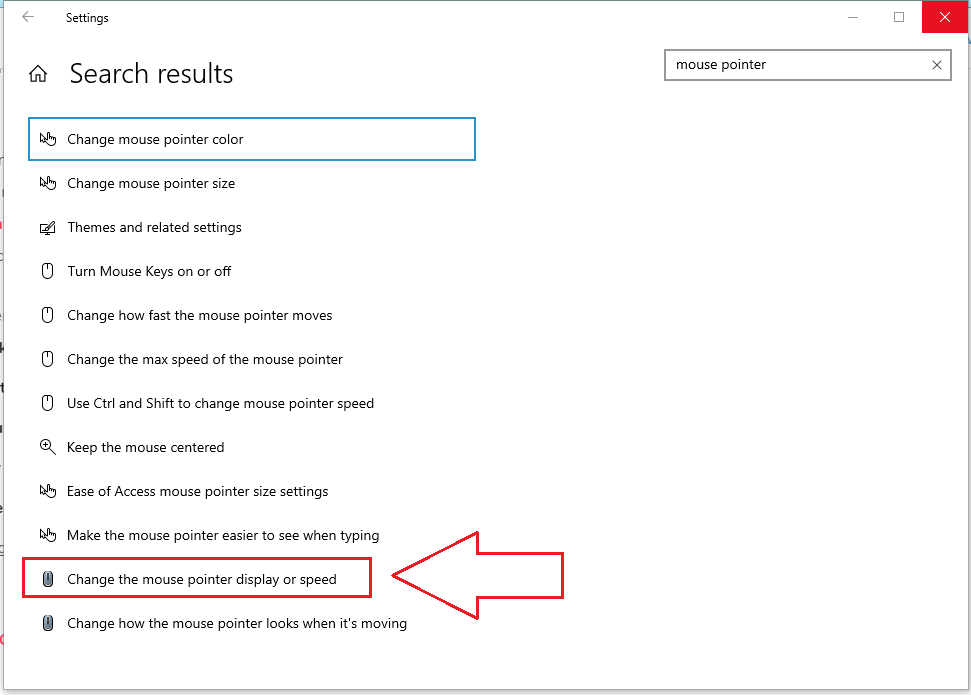
- Go to the “Pointer Options”’ tab from the window that pops up.
- Uncheck “Enhance Pointer Precision”
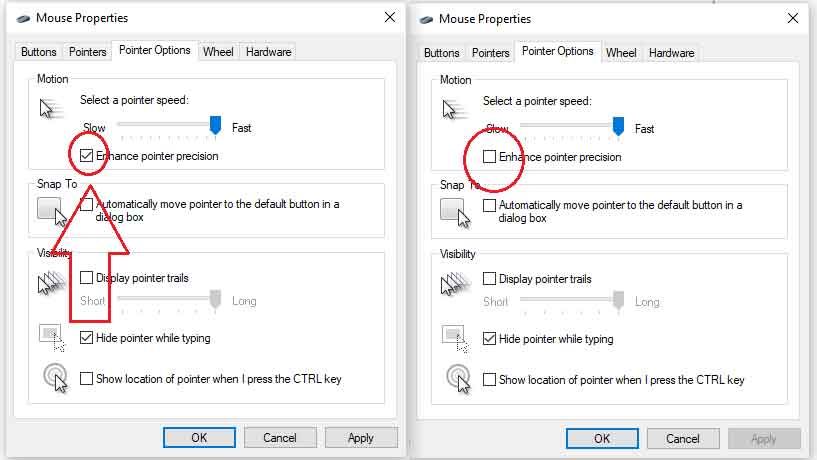
- You can also change the pointer speed slider for the best-suited configuration for yourself.
Also read: Top 10 Best Corsair Mice
Game Mode
This is one of the easiest Windows 10 performance tweaks for gaming as it’s built into the system. Game Mode made its appearance in the latest releases of the OS and gained well-deserved popularity.
It dedicates more system resources to games for a better and faster gaming experience. This Game Mode is also designed to spare your system from hogging due to other programs, such as Windows update, within a game.
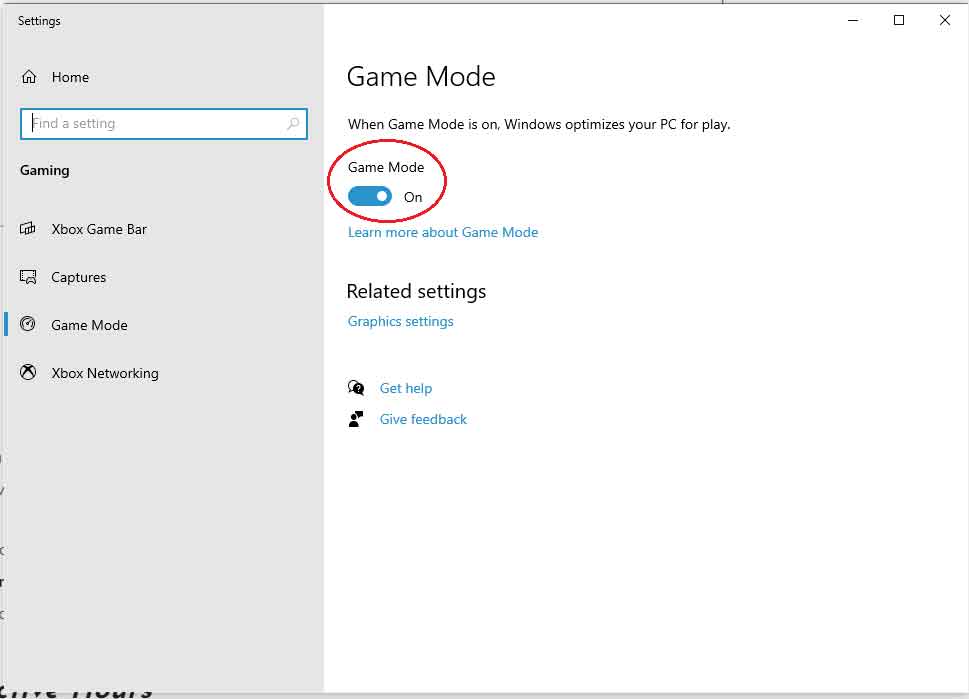
To get to Game Mode settings and change optimize them follow these steps;
- Press Windows key + I.

- In the search box type “game mode”.
- Choose “Control Game Mode for optimizing your PC for games”.
- This will lead you to a menu where you then locate Game Mode and click on it.
- Then turn the switch to “On” and your Game Mode is ready.
You will find yourself playing faster and smoother games after this mode has been turned on. However, your system may or may not support this Game Mode when you try to tweak it.
If you’re unable to find these settings in your system, it is probably only because the latest Windows Creators Update has not been installed on your PC yet. Get it and enjoy the Game Mode that will optimize your performance in PC gaming a great deal.
Active Hours
Windows 10 can install and reboot the computer even if you are playing a game without a warning. This can be frustrating, especially if your abrupt disappearance can affect your ranking or the teammates you leave behind.
For a competitive gamer, this is nothing less than a nightmare!
And, if it doesn’t restart your computer, an update being downloaded quietly in the background can still slow everything down by taking up the working memory of the system and limiting your connection speeds.
This aggressive updating is for the best of its users because previously users wouldn’t update the Windows on their own and the systems would regularly be exposed to cyber-attacks and threats. This is why it is advised against completely turning automatic updates off.
These updates are there to protect your system, keep it updated and working optimally, and may ruin your raid once in a while.
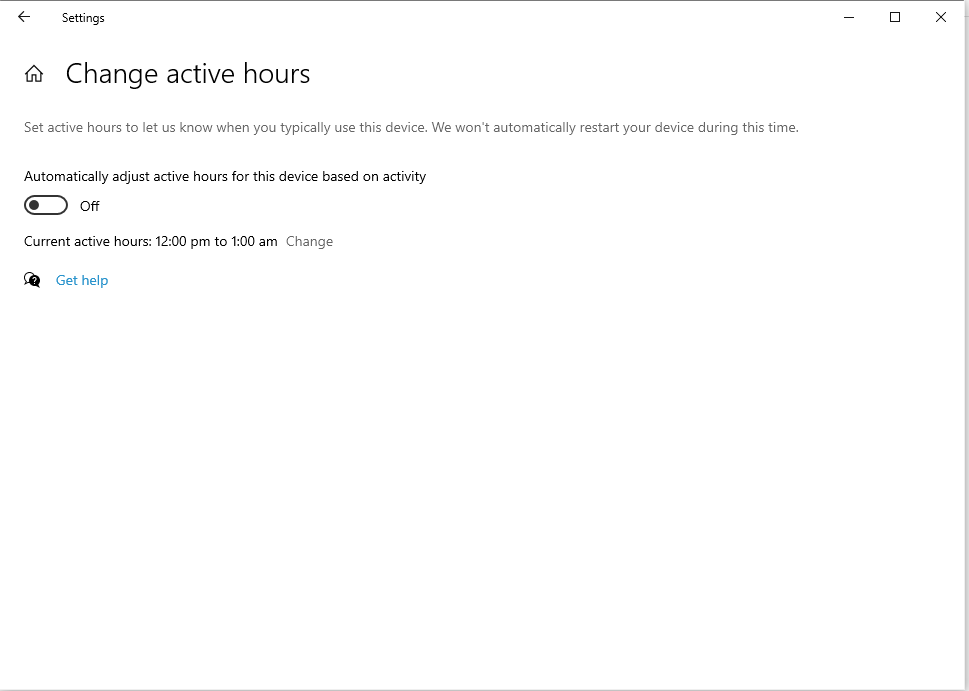
The solution to this predicament is setting your active hours appropriately. This means you can specify working and gaming times in Windows to prevent downloading in these times. Windows then uses the inactive hours in your schedule to update and restart your system.
To set the active hours follow these steps;
- Press Windows key + I.
- Go to “Update & Security”.
- From the menu click “Change Active Hours”
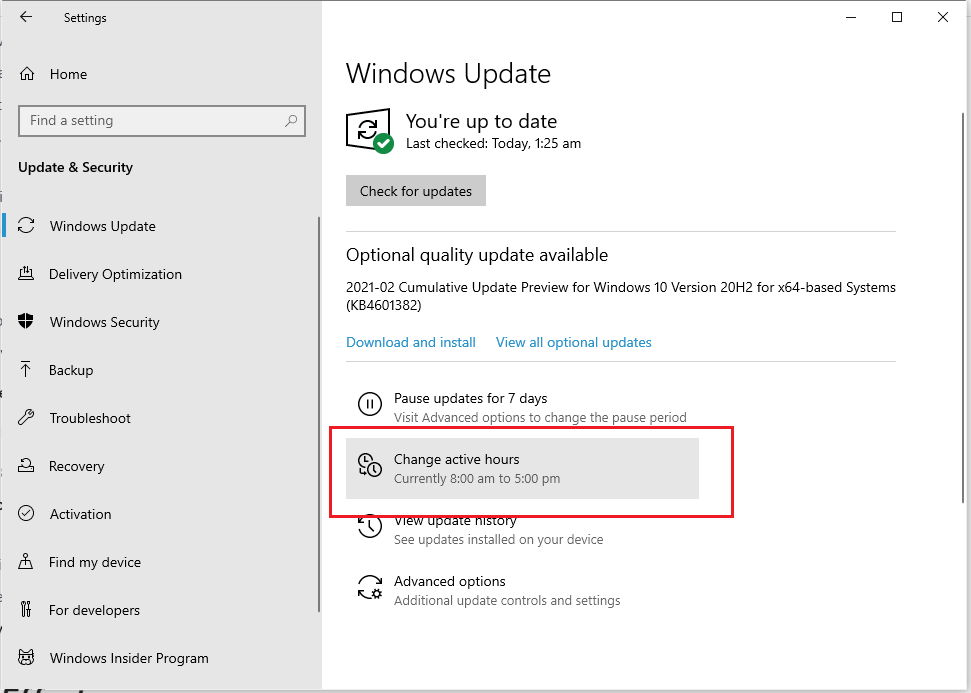
- Set it up to 15 or 18 active hours and leave a gap of 6 hours which is the time Windows will install your updates.
Or you can also make Windows send you a reminder when it is going to restart the system. You can do so by going to the Windows update and then to Advanced options to switch on “we’ll show a reminder when we’re going to restart”.
Tweak Visual Effects
When learning how to optimize Windows 10 for pc gaming, discussion on visual effects is a must. Windows 10 Graphical user interfaces (GUIs) comes with many fancy visual effects. These visual effects sure look good but can affect the available processing power of the system when you’re running a game in the foreground. Hence, one of the Windows 10 performance tweaks for gaming includes some or maybe all of these settings.
To do so, follow these steps;
- Hit the Windows key +I.
- Type “Performance” in the search box and select “Adjust the appearance and performance of Windows”.
- A window will open in front of you where you can choose “Adjust for best performance”.
- Go to the Advanced tab and make sure that the setting has been applied to Programs.
- If you feel this graphics setting is too bland, you can keep the following options from the checked list to keep get a pleasing appearance:
- Show thumbnails instead of icons.
- Show window contents while dragging.
- Smooth edges of screen fonts.
Steam Auto-Updates
Just like Windows Updates, users encounter the same problem with Steam auto-updates. Even if you haven’t played a game in years, make sure you steam auto-update it because steaming in the background can gobble up the memory of your PC and significantly slow your gaming performance. You can stop Steam from updating games during your game by simply doing the following;
- Go to the Steam client settings.
- Open “Downloads” and find the update option.
- Then uncheck “Allow downloads during gameplay”
You can also roll back a game version to the one you need by right-clicking on the game in Steam and choosing “Properties”’. From “Properties” go to the “Betas” tab and choose the version of the game you want from its drop-down menu.
This is quite a useful feature as games on Steam get updated all the time and often the newer updates come with newer bugs. This is why most of the pc gamers wait until they hear about how a new update is doing before they get their own.
Nagle’s Algorithm
The efficiency of IP/TCP networks is improved by Nagle’s algorithm as it creates bundles of data packets that reduce the number of data packets needed to be sent over the network. The whole process can greatly slow your internet connection down and make it less stable.
Disabling Nagle’s Algorithm is the solution but is somewhat a complex process but following these step by step guide will help you get there:
- Press Windows Key + Q.
- Type “Regedit” and click on the Regedit file.
- Go to your Windows Registry Editor from there and scroll down the HKEY_LOCAL_MACHINE menu.
- From this you’ll find a path: SYSTEMCurrentControlSetServicesTcpipParametersInterface.
- You’ll be led to a menu with folders containing many letters and numbers in them. Match your IP address with DhcpIPAddress in one of these folders to access the correct file.
- Then press the Windows key + X to find your IP address.
- Then go to Control Panel, followed by “Network & Internet”.
- From there go to “Network and Sharing Center”, “Connections”, “Details”, and finally “IPv4 Address”.
- Now you can hunt down the folder having the right IP address and right-click on it to get a new DWORD (32-bit) Value.
- After this, you’ll need to create two values. TCPNoDelay and TcpAckFrequency.
- Set both of their parameters to 1 by double-clicking on each of them.
And after you’ve followed all these steps, the Nagle’s Algorithm will finally be disabled.
Updated GPU Drivers
Your PC’s performance in games is greatly influenced by the kind of GPU (Graphics Processing Unit) you’re using. To reap all the benefits a GPU offers for pc gaming, you need to keep them updated at all times. Outdated GPU drivers invite many bugs, cause glitches, and multiple systems crash. Windows 10 does not update the GPU drivers in your system automatically, but oftentimes, special software is created by manufacturers in the form of GPU control panels to allow you to regularly check for updates or notify when a new update is ready.
An efficient GPU is crucial for a quality gaming experience and thus regular updating will save you from plenty of trouble. You can get the GeForce Experience or Radeon Software Adrenaline depending on the GPU’s manufacturer and check auto-updates, take suggestions for powerful optimizations.
Although you can easily update your GPU Drivers from the Windows properties, it is advised to stay safe and go directly to the manufacturer’s website. from the website, you can choose your GPU model and check for its updates.
To exactly know your GPU’s specs you can;
- Right-click on Desktop
- Click on “Display Settings”.
- Go to “Advanced display settings”, and click on “Display adapter properties”.
Here you can play with the settings and get what suits you the most.
Also Read:
The Cheapest 4k Graphics Card
Best Budget Graphics Card
Get DirectX 12
For anybody who is really invested in PC gaming with Windows 10, getting a DirectX 12 is a must-have! DirectX is an application that tells your computer what to do by communicating with it during the game.
DirectX 12 offers improved performance by facilitating the graphics cards to draw resources from more than one CPU core, enhancing graphic effects, increasing the frame rates, and lowering the power consumption. This is a significant improvement in DirectX 12 over its predecessor DirectX 11.
Note that you can only enjoy these benefits of DirectX 12 if the game you’re playing was developed using the same version. This, these days, is not an issue as the list of such games keeps extending.
Now, to make sure you have the latest version of DirectX installed, follow these steps:
- Press Windows key + R.
- Go to the search box and type “dxdiag”.
- Click “OK” to open the DirectX Diagnostic Tool.
If you happen to not have DirectX 12 installed, you can go ahead and install it in just a few minutes and just three simple steps.
- Hit the Windows key + I.
- Click on “Update & Security”.
- Go to the “Windows Update” tab and choose “Check for updates”, and get the installation done.
Get an SDD
A Solid-State Drive or SDD significantly reduces loading times and resultantly improves your game performance.
Speed and accuracy are the two main concerns of any pc gamer and they are always on the lookout for tips on how to make windows 10 faster for gaming.
Yes, SSDs are quite expensive, but they are worth your investment as switching from an HDD to SSD can take your loading times down to 2-3 seconds from 30-40 seconds.
This is quite an impressive ability considering the huge amount of disk space these modern games require. You can get an SSD for your OS and a big HDD for your games if getting a large SSD becomes too expensive.
Our Recommendations
Kingston 240GB A400 SATA 3 – Check Today’s Price
Samsung (MZ-V7E500BW) 970 EVO SSD 500GB – Check Today’s Price
SAMSUNG 870 QVO SATA III 2.5″ SSD 1TB – Check Today’s Price